

Key Takeaways
- You don't need mechanical expertise to spot most red flags on a used car.
- Exterior rust, uneven panel gaps, and mismatched paint can indicate prior collision damage.
- Checking under the hood, inside the cabin, and underneath the car covers the majority of common problem areas.
- A test drive should include cold-start, highway speeds, hard braking, and sharp turns.
- Your DIY inspection is a filter, not a final verdict - always follow up with a professional pre-purchase inspection.
What you will need
Why Your Own Eyes Matter Before You Call a Mechanic
Most used-car buyers either skip a hands-on inspection entirely or assume that only a certified technician can identify problems. Both approaches leave money on the table. A non-expert can catch the most common and costly red flags - collision repair, fluid leaks, deferred maintenance, and structural rust - with nothing more than a flashlight, a clean rag, and a checklist.
This walkthrough gives you a repeatable process to use on any used vehicle, whether you're looking at a private seller listing or a dealer lot. It is designed to work alongside - not replace - a professional pre-purchase inspection. Think of it as your personal filter: if a car fails your check, you walk away before spending money on a mechanic's time. If it passes, you proceed with greater confidence. For context on where this fits in the broader process, see the full car-buying journey.
What you will need
What to Bring and How to Set Up the Inspection
Before you arrive, confirm the meeting in daylight and on dry pavement - overcast light is fine, but rain hides rust streaks and wet asphalt makes it hard to spot fluid drips. Ask the seller not to warm the engine up in advance; a cold start reveals far more than a pre-warmed one.
Flashlight or phone torch
Illuminates dark areas under the hood, inside wheel wells, and beneath the car to reveal rust, leaks, and damage.
Clean white rag or paper towels
Used to check engine oil color and consistency, coolant condition, and transmission fluid on the dipstick.
Vehicle history report (VIN-based)
Reveals recorded accidents, title issues, odometer discrepancies, and prior ownership count before you inspect in person.
Tire tread depth gauge
Provides an accurate measurement of remaining tire life across all four corners, flagging uneven wear patterns.
Magnet
A magnet that fails to stick to a body panel can indicate that area has been filled with body filler, a sign of collision repair.
Step-by-Step Inspection Walkthrough
Work through the steps below in order. Taking a systematic route around and through the car prevents you from missing sections and keeps the seller from rushing you into skipping areas.
Walk the Exterior in Full Light
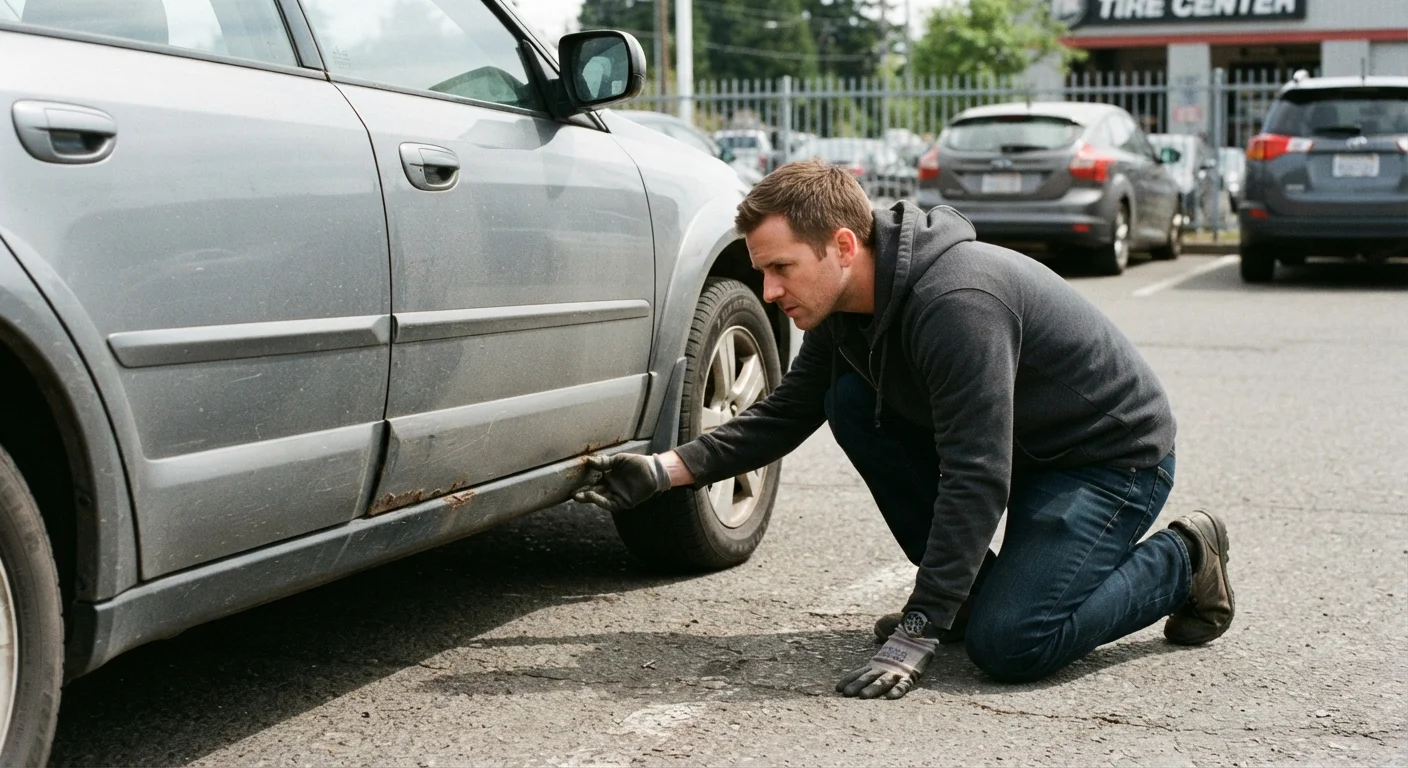
Start at the front bumper and move clockwise around the entire vehicle, crouching at each corner to sight down the body lines. Look for:
- Uneven panel gaps between doors, fenders, and the hood - inconsistency suggests collision repair or poor reassembly.
- Paint color mismatch - hold your phone camera parallel to each panel; slight differences in sheen or texture are easier to spot at an angle.
- Rust bubbling along the rocker panels (the metal strips beneath the doors), wheel arches, and the lower edges of doors.
Check Under the Hood
With the engine cold, open the hood and spend two to three minutes scanning methodically from front to back:
- Oil: Pull the dipstick, wipe it, reinsert, and pull again. The oil should be amber to dark brown and sit between the min and max marks. Black, gritty oil suggests neglect. A milky or frothy appearance can indicate a coolant leak into the engine - a serious issue.
- Coolant reservoir: Inspect the level and color through the translucent plastic tank. It should be green, orange, or pink depending on type - never rusty or oily.
- Belts and hoses: Look for cracks, fraying, or glazing on any visible belts. Squeeze accessible hoses - they should be firm but slightly pliable, not rock-hard or mushy.
- Signs of leaks: Oily residue, white crusty deposits, or dark staining on the engine block or around hose connections all indicate active or prior leaks.
Inspect the Cabin and Electronics
Sit in both the driver's seat and the rear seats. Check:
- Warning lights: Turn the key to the "on" position without starting the engine - all warning lights should illuminate briefly and then turn off. Any light that stays on after startup (check engine, ABS, airbag) warrants investigation.
- Seat condition and adjustment: Test all power or manual seat adjustments. Worn-through bolsters on a claimed low-mileage car is a mileage red flag.
- Odors: Musty or mildew smell suggests water intrusion. A strong air-freshener scent can be masking the same problem.
- All powered functions: Windows, locks, mirrors, infotainment screen, climate control, heated seats if equipped. Electrical repairs are disproportionately expensive.
Get Under the Car (Safely)
You don't need a lift. Crouch and shine your flashlight under the front and rear of the car from a safe distance. Look for:
- Active fluid drips - oil, coolant (sweet smell, often green or orange), or transmission fluid (red or brown) on the ground beneath the car.
- Exhaust system condition - significant rust, holes, or makeshift repairs to the muffler or pipes.
- Frame rails - the structural members running front to back should be straight and unkinked. Weld marks, bends, or bright new metal in isolated spots can indicate collision frame repair.
Conduct a Structured Test Drive
The test drive is not a casual cruise around the block. Plan a route that includes a cold start, surface streets, at least a short highway segment, and a quiet area for low-speed checks.
- Cold start: Listen for rattling, ticking, or excessive exhaust smoke. Blue smoke indicates burning oil; white smoke (not condensation that clears in 30 seconds) can mean coolant burning in the engine.
- Acceleration: The car should pull smoothly through all gears with no hesitation, shuddering, or unexpected RPM spikes.
- Braking: Find a safe straight stretch. Apply firm, steady pressure - the car should track straight, stop without shuddering, and not pull to one side.
- Steering: Loosen your grip momentarily on a straight road. Noticeable pull suggests alignment or suspension issues. Listen for clunks when turning at parking-lot speeds.
- Noise inventory: Clicks or pops during turns (CV joints), grinding during braking (worn pads), or a whine that changes with speed (wheel bearings) all have diagnostic value.
Document Everything as You Go
Take photos and short videos of anything that catches your attention - unusual gaps, fluid residue, warning lights, tire wear. This record is useful when negotiating price, reviewing later with a mechanic, or comparing multiple vehicles. Sellers generally expect buyers who inspect carefully; it's a sign you're serious.
Knowing When to Walk Away - and When to Go Deeper
No used car is perfect. The goal is to distinguish between cosmetic imperfections (minor door dings, worn carpet) and structural or mechanical concerns (frame damage, oil leaks, transmission hesitation). A single amber flag is worth negotiating over; multiple flags in the same category - especially anything touching the frame, the engine, or the transmission - usually warrants walking away or insisting on a professional inspection before signing anything.
If the car passes your walkthrough, the logical next step is an independent mechanic's pre-purchase inspection. That process goes deeper into the suspension, exhaust, and computer diagnostics that are beyond a visual check. See what a pre-purchase inspection covers to understand the scope and cost. For ongoing car maintenance guidance after you've bought, that resource covers keeping any vehicle running reliably long-term.
A DIY Check Is Not a Professional Inspection
This walkthrough helps you filter out obvious problems and identify cars worth investigating further. It cannot replace a full pre-purchase inspection by a qualified mechanic with a lift, diagnostic tools, and experience across thousands of vehicles. For any significant purchase, treat a professional inspection as a standard step - not an optional one. The pre-purchase inspection guide explains what that process typically involves and costs.